Part 1: Welcome to the ModFarm Newsletter System
Reach your readers. Own your platform. Grow your career.
If you’re like most authors, you’ve probably heard you should “start a newsletter.” But what does that actually mean? And how do you make it work for you—without drowning in tech or relying on third-party platforms that could change the rules overnight?
That’s where the ModFarm Newsletter System comes in.
We’ve built a fully integrated, easy-to-use newsletter tool directly into your website. It’s powered by The Newsletter Plugin and enhanced by ModFarm to give you a fast, reliable way to connect with readers on your terms.
And the best part? You’re not doing this alone.
The Basics
The ModFarm Newsletter System is:
- A fully hosted, custom-installed email system built into your ModFarm site’s dashboard.
- Unlimited: no cap on subscribers, no per-email costs.
- Powered by Amazon SES for world-class deliverability.
- Supported by us—from setup to support.
No more struggling with third-party platforms or worrying about deliverability. You own your list. You write your message. ModFarm helps you send it.
How Your Newsletter Helps
Relying on Amazon, Facebook, or Substack to connect with your readers is risky. Algorithms change. Platforms disappear. Ownership is everything. A lot of people don’t think they’ll get de-platformed until they do. Romance author? Dark Fantasy? Grimdark? All it takes is one content complaint and your business is frozen until its straightened out.
When you rely on platforms of which you have no ownership, you are taking on risk.
Newsletter content, especially your mailing list, is NOT owned by someone else. Change providers? Bring it with you. It is a direct connection to your readers that is actually under your control and ownership. A rarity in the digital world.
As a result of this, your newsletter list is the single most valuable asset in your author business. Why? Because:
- Email is direct and personal.
- It’s not subject to platform changes or shadowbans.
- You can drive traffic back to your site (and your books).
- It builds long-term reader relationships—the kind that buy your books.
The ModFarm system provides a direct connection between your audience, your marketing, and your books, all tied together with shared content and direct metrics. No other platform does that. And, its easy to use, just drag and drop and load your pics and hit send.
What You Can Do With It
A newsletter is a direct connection to your readers, providing an algorithm free means of communication. You send it, they receive it. Social Media won’t do this. And this direct connection means you can provide meaningful information to your readers that they are wanting to get. Things like:
- Updates about new books, series, or events
- Send blog posts directly to their inbox
- Use free stories to build your list
- Send automated digests of new content (weekly or monthly)
- Create launch announcements, holiday notes, or monthly recaps
What’s Next
In the next section, we’ll show you exactly how to get started—step-by-step—with screenshots, setup tips, and ideas for your very first newsletter.
Let’s go!
Getting Started with Your Newsletter
Now that you know what the ModFarm Newsletter System is, let’s walk through how to use it. Whether you want to send a one-time announcement or set up automated content, it all starts in your WordPress dashboard.
Step 1: Find the Newsletter Dashboard
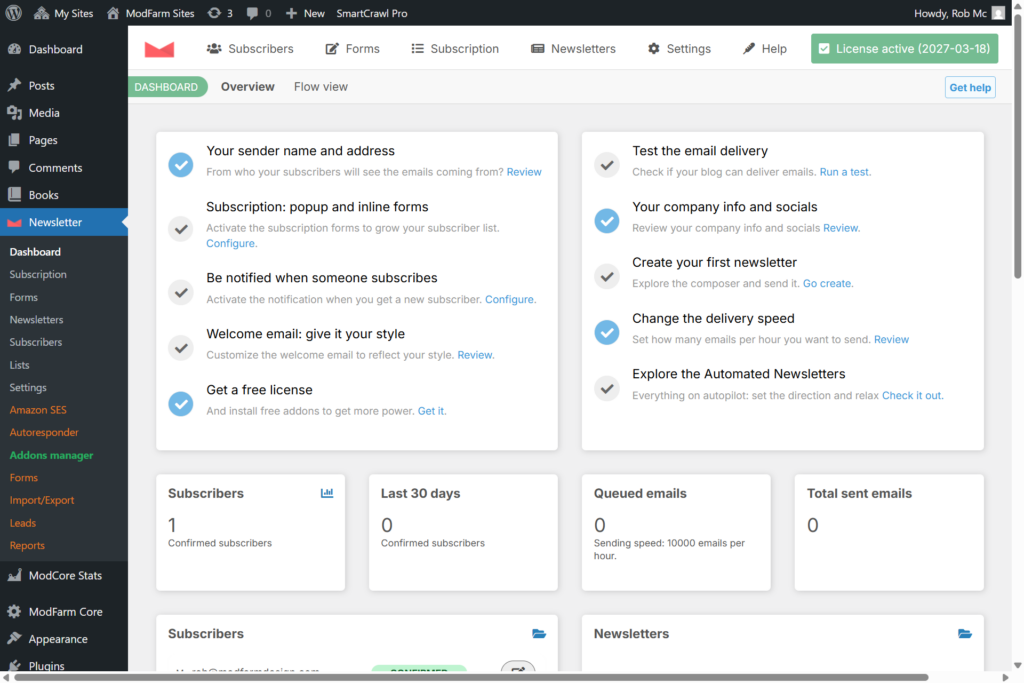
Once your site is set up with the ModFarm Newsletter System, you’ll see a new menu item in your WordPress dashboard called “Newsletter.”
Tap or click it, and you’ll land on your control panel—this is your home base for writing, sending, and managing your email campaigns.
Step 2: Create Your First Newsletter
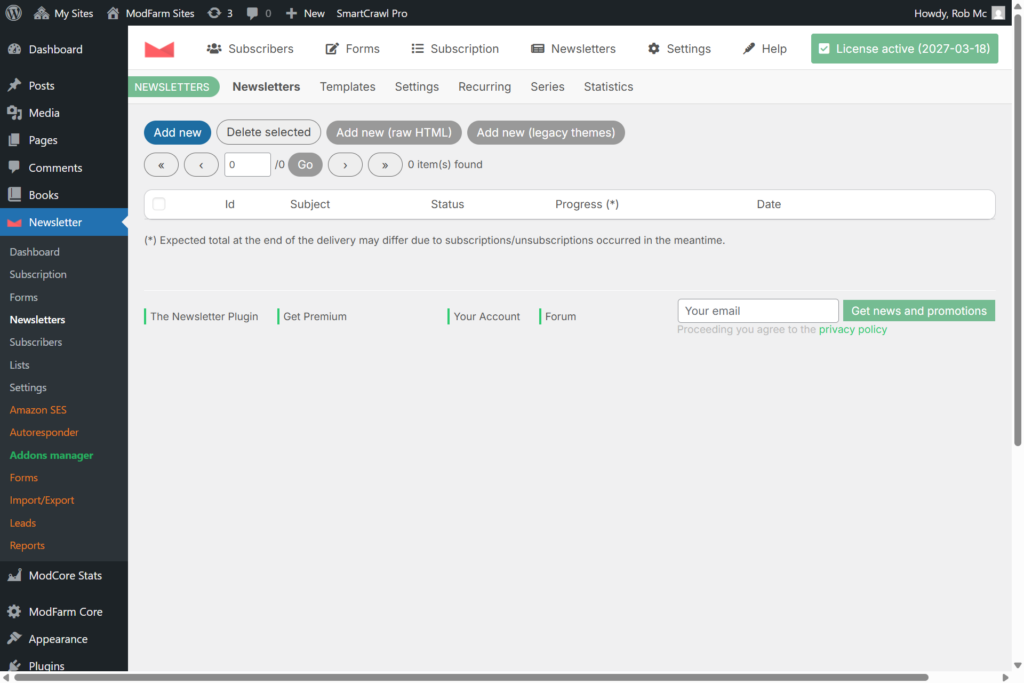
From the Newsletter > Newsletters screen, click “New Newsletter.”
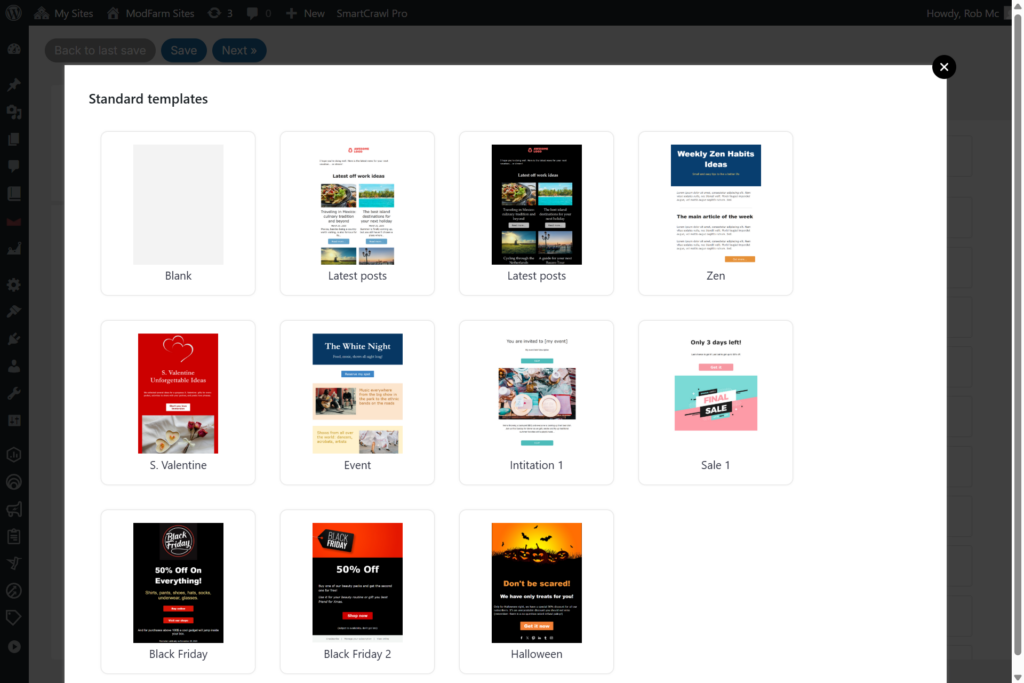
A modal for template options will pop up. You can select something pre-made or you can start with a blank one and build from scratch. You can even create your own custom template and use that (more on that in a later post).
For the purposes of this tutorial, we’re going to go with a blank template.
Step 3: Using the Composer
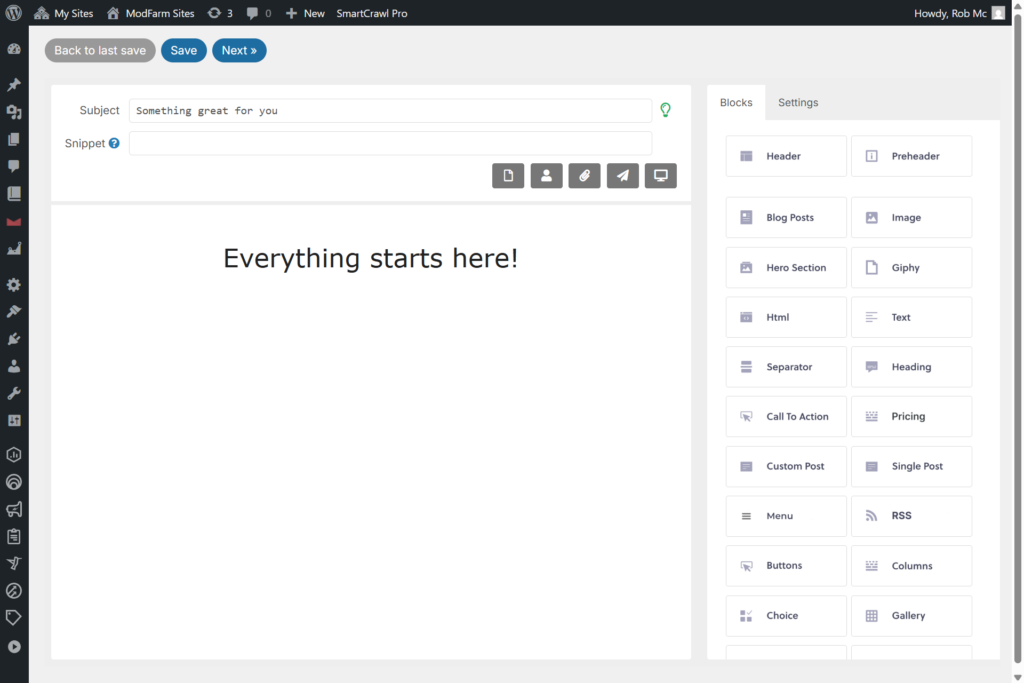
The Composer is built on a block system, and the newsletter is created by dragging blocks over and then selecting your display options and adding content where applicable. Blocks are little dynamic pieces of code that facilitate formatting text, images, and more into email friendly content.
We’ll go through a few here to help you get started.
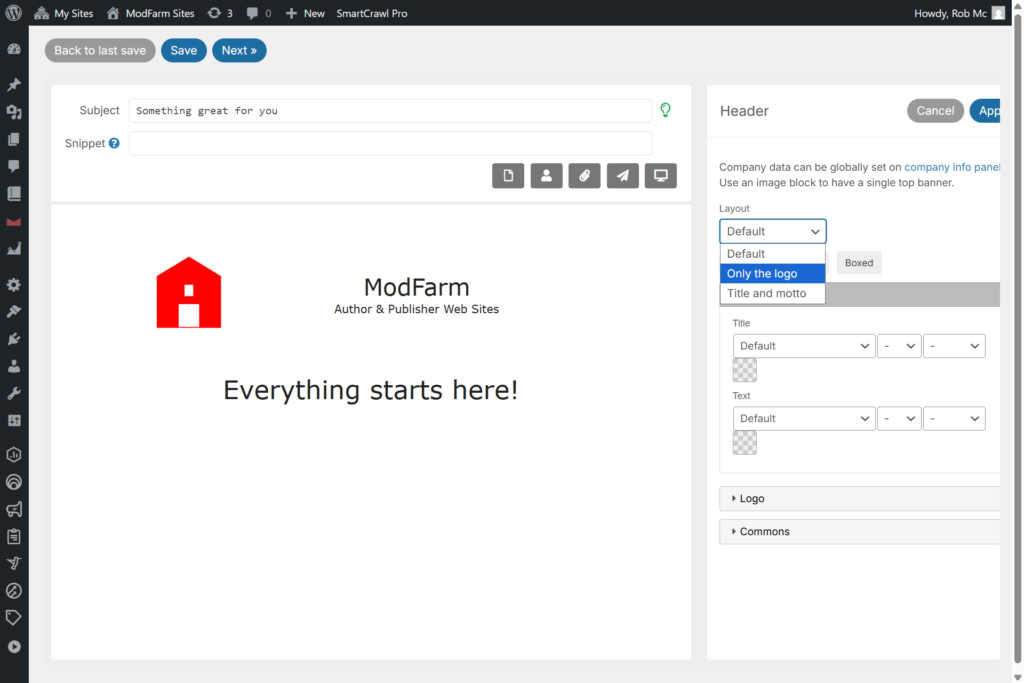
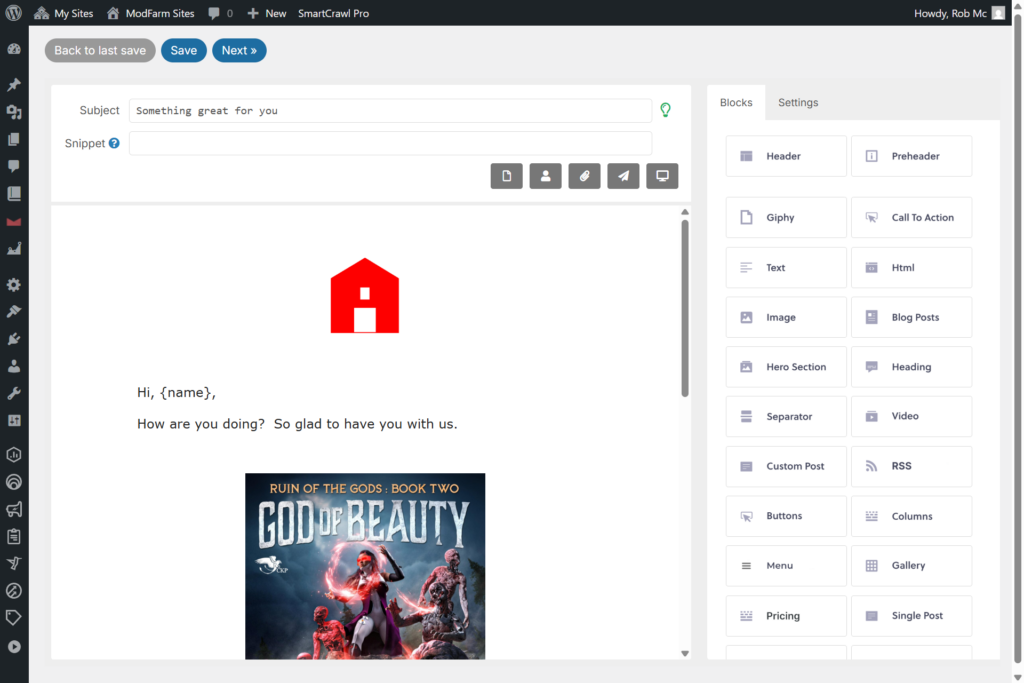
First, lets put a header on this thing, so we’ll drag over the Header Block. It will pull information from the Company Info section of the Newsletter Settings (see the little link up there? That’s what it means). You can leave it as-is in the default, but I tend to like the simple logo, so we’re going to change that selection to “Only The Logo” to streamline that a bit.
Next, we’re adding in a text block, so just drag one of those over and under the Header block, and above the Heading block, like so.
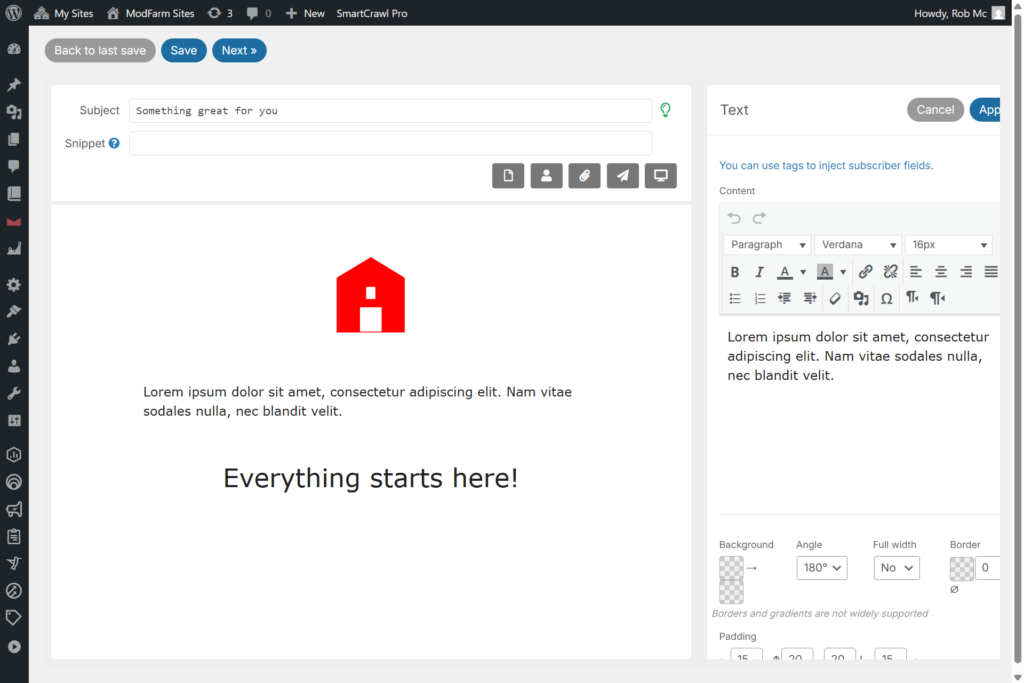
You can see that doing so opens up an editing panel. You can change your text there by typing or pasting into that text block. It works like any other text editor, and you can make adjustments as needed.
ModFarm Tip: If you copy/paste, do so as “Plain text” and not just a straight copy – lot of formatting is in most editors like Word, Pages, Docs, etc. Avoid that confusion by just pasting as plain text. Also, really recommend not adding text or media into the editor. I know you can, it just makes formatting a real pain and it can make your final email look pretty jinky.
Now, lets clean up that text and add a more personal greeting.
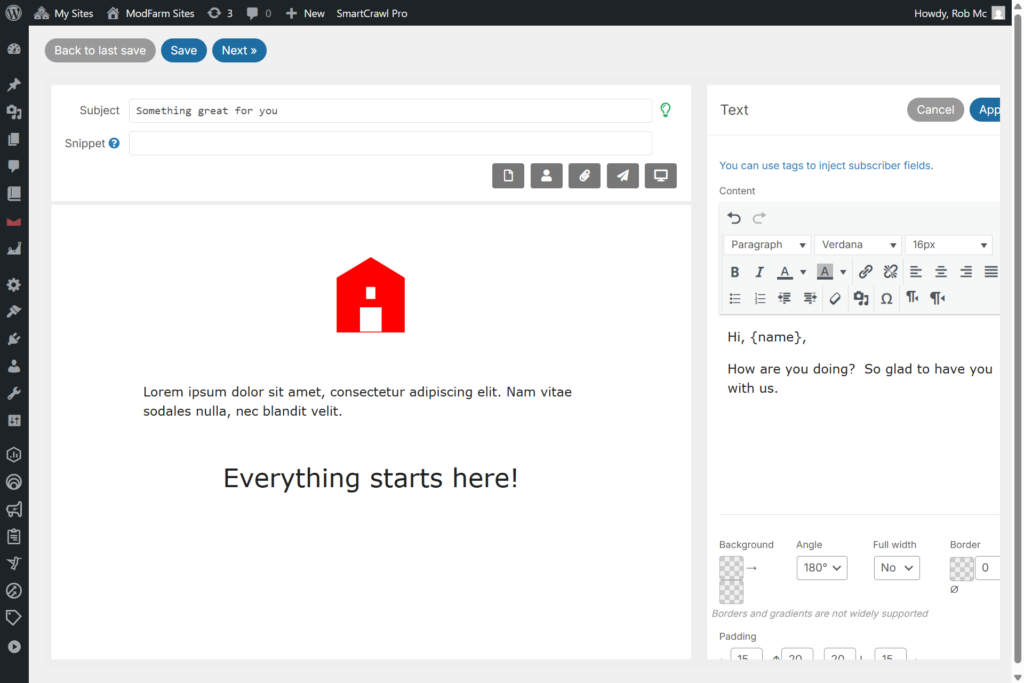
In the text editor window, make your changes. To make a more personal greeting, use the {name} shortcode. It will pull the first name from the subscriber to and place it into the email automatically.
You can keep writing as much as you want there, but I would limit it to text. If you want to add an image or a button, or some other kind of non-text content, I would use a block.
So, lets show that by adding an image.
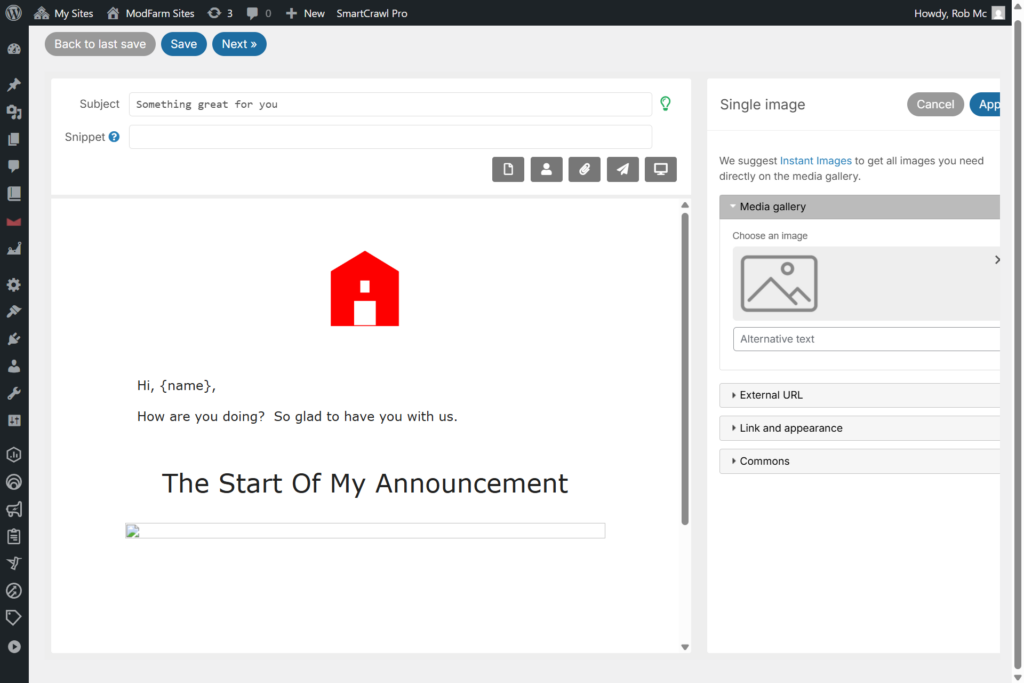
Here we have dragged over an Image block and you can see it has opened up the settings automatically. When adding an image, you want to select the image (you can upload a new one or select from something already in the Media gallery of your site), and then you want to adjust the link and appearance.
Here is that process.
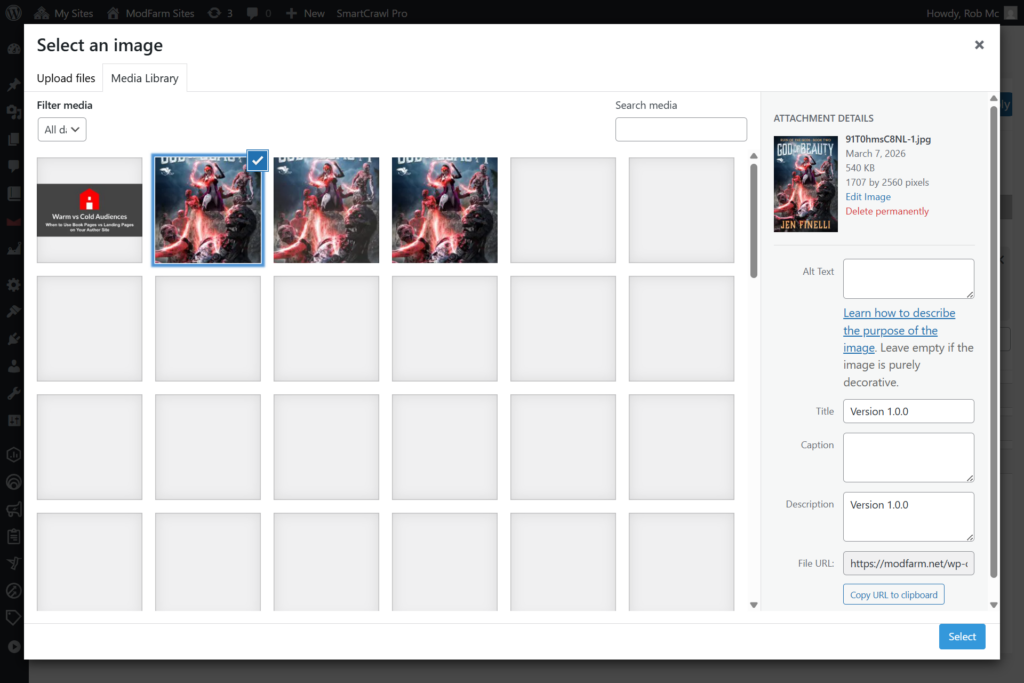
When you click on the little picture icon in the Image Block settings panel, it will open up the media loader. You can select from existing images (like we’re doing here) or upload new images (the Upload Files tab in the image above).
Select the image you want to place, click “select” and it will place the image.
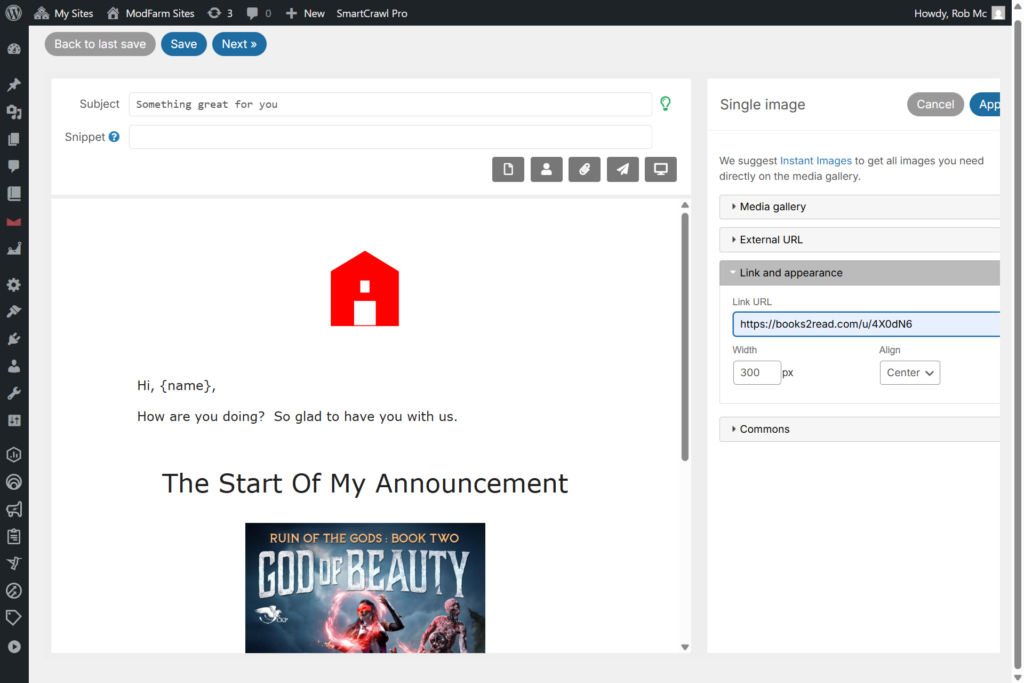
To add a link to an image, use the “Link and Appearance” panel, like in the above. “External Link” is if you want to use an image that is not in your site (maybe an image link someone else provided).
Add in your link, check alignment (center here), and then adjust the width.
ModFarm Tip: It’s important to adjust the width! Email is old tech, and it has its own rules. One of them is images – if you keep a super wide image, it will try and display it, and that usually means your text size goes from a nicely readable font to a micro-font. Not the best. We recommend a maximum width of 550px for all images. We like to use 300px for standard book covers and 400px for audiobook covers.
Changing a a block once it’s placed.
You might have noticed that in our sequence so far, the Heading changed from “Everything starts here” to “The Start Of My Announcement.” Here’s how we go about doing that.
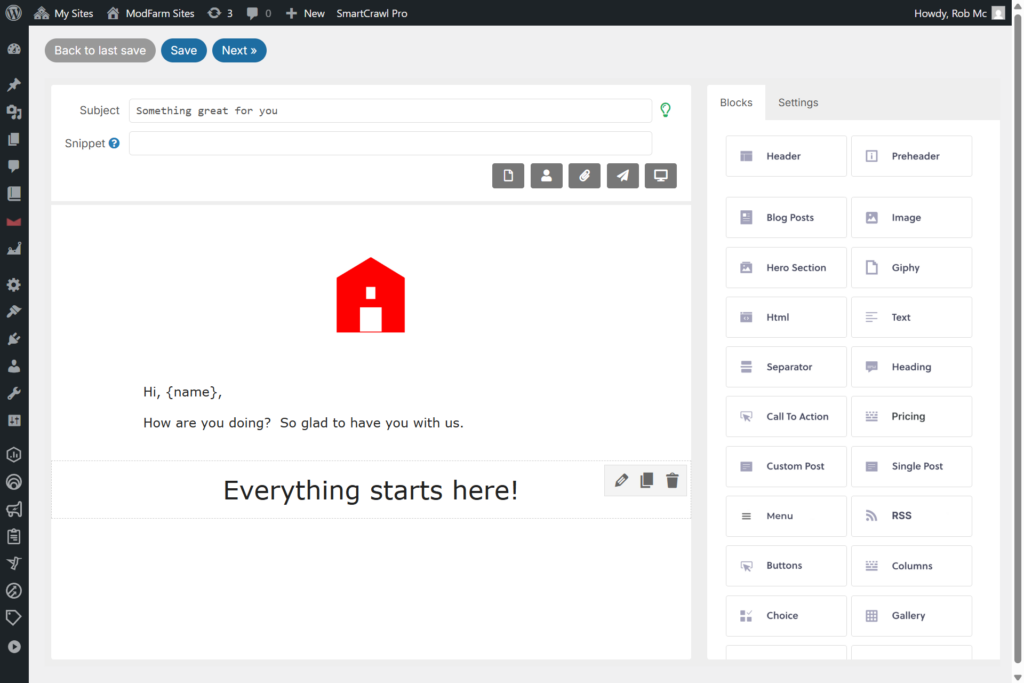
When you hover over an existing block, it shows you three little icons on the right side of it. One looks like a pencil, one like two sheets of paper, and one like a trash can.
Clicking the pencil lets you edit the block. Clicking the papers duplicates the block. Clicking the trashcan deletes the block.
We are going to edit the block, so clicking on the Pencil.
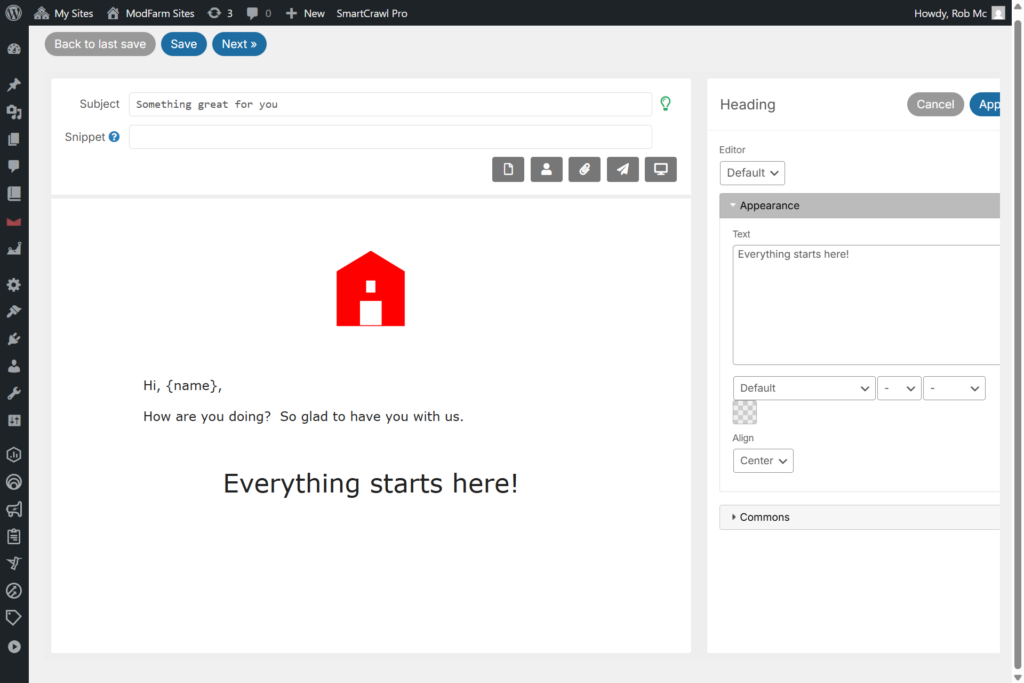
Here you see it opened up the editing panel for the Heading block. Make the changes you want, and then click “Apply” and, voila, changed.
That same process works with any block. Click on it to activate the editing options, select one, and then make the changes you want.
Now, how about we put a little action in this thing… with a Call To Action block!
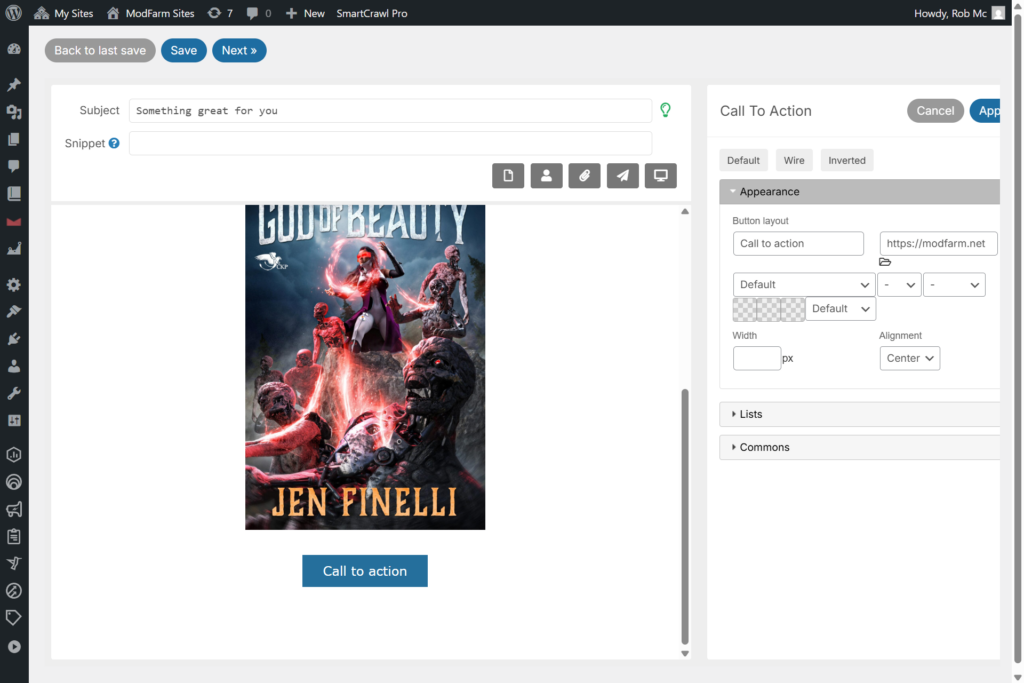
A “Call To Action” block places a button into the email. You can format that button how how you want. This image is how it looks when its stock out of the box. I’m going to tailor it a bit here to make it more to my liking and style.
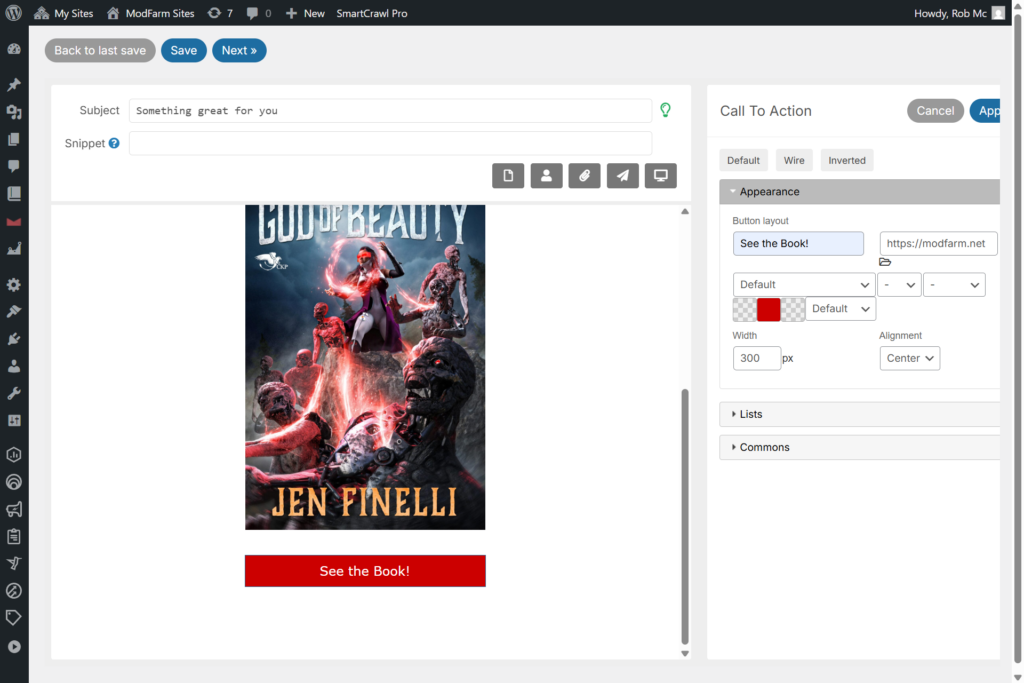
You can see that I changed the text to “See The Book!” via the text box and I changed the color to red using the color picker. I also changed the width to “300” to match the width I’d set for the book cover.
While the image has a link, I find it helps a lot to focus the reader with a button as well. It’s a slight duplication, but you get better clicks. Some people don’t click on the image, they just don’t recognize it as clickable, or perhaps they just need the extra direction of a button. I find that with many of the newsletter sent, it ends up being about 50% image and 50% button. Just how people are, I guess.
Once you have the email how you want it, you need to add a closing footer. This is not only a good practice, but also a legal requirement. You have to give people the option to unsubscribe or change their preferences and you need to identify yourself as a company/marketing entity (usually name and an address, and some just use their town level address if operating from your home).
There is a pre-made block for this, and here is how you use it.
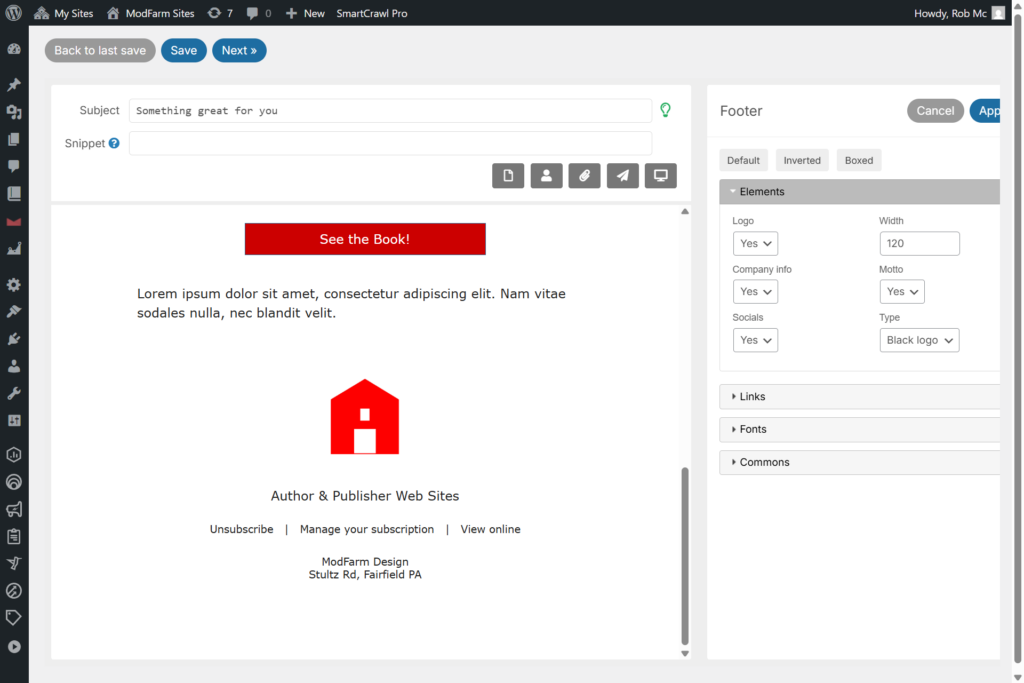
You can use the “Footer” block to just drop in an all-and-done footer to your email that meets your requirements. Like the Header block, it draws from the Company Info panel in Newsletter Settings. It will grab the log, address, links, and social media (if you have any entered). and present it all nice and neat.
There is a settings panel, as you can see above, that lets you tailor it if you want to add things, remove things, change sizes, colors, etc. Totally up to you.
Just be sure to add the Footer block to your email to make the email services happy (many will flag you as spam without it).
As always, make sure to “Save” to keep your work.
Step 3: Send a Test Email
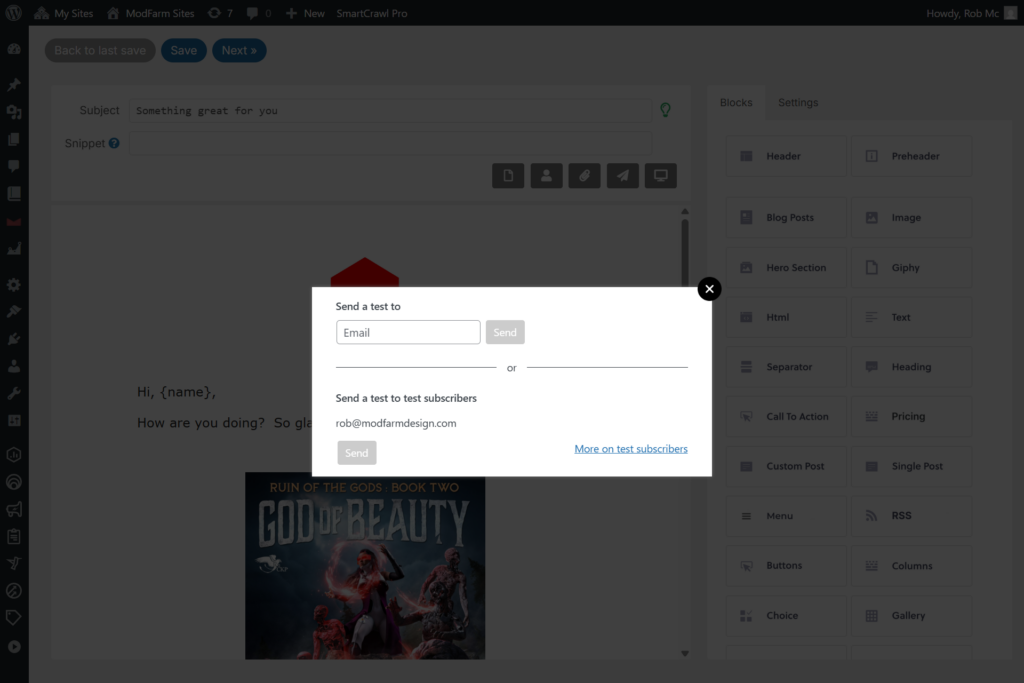
Before you blast it out to your list, click the “Test” button, which is at the top of the newsletter editor area and looks liek a little paper airplane (See those 5 gray icons in the pic above? Those are the ones, click the paper airplane one).
Enter your own email address and see how the newsletter looks in your inbox.
This is a great way to:
- Catch typos or formatting quirks
- See how the layout performs on desktop and mobile
- Get confident before hitting “send”
Step 4: Schedule or Send
Happy with the final result?
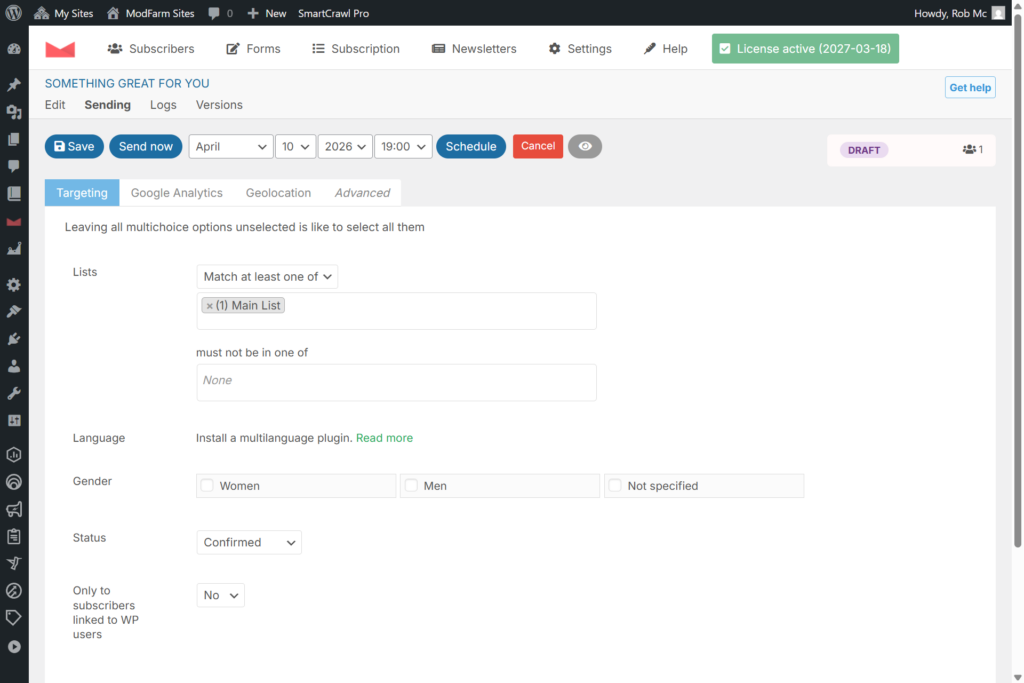
Click “Save” and then “Next” and you’ll be taken to the Sending panel. From there you can:
- Choose your recipients by List
- Send immediately or
- Schedule it for later (great for launches or announcements)
The select you list to send to (and you can select more than one), use the drop down and select what you want, just like in the image below.

Once you make your list selection, go ahead and hit “Save” and that will lock it in. From there you can decide to send it right then and there by clicking “Send Now” or you can schedule it for later by clicking “Schedule.”
If you decide to schedule it, it will open up a date and time selection pane, like in the image below. Make your selections and click “schedule” again and it will send at the specified time.
Your email will be sent using Amazon SES behind the scenes, ensuring fast and reliable delivery to inboxes worldwide.
You Did It!
You just built your first author newsletter!
And the newsletter system can do a lot more than just sending a single email. It can automatically send email sequences, download links, and blog posts. It can segment your lists by action, provide an incredible wealth of metrics that you can actually act on, even long after the fact.
Stay tuned for more tutorials like this one on how to do more with ModFarm.
And remember—you’re never alone. ModFarm is here to help if anything goes sideways.